
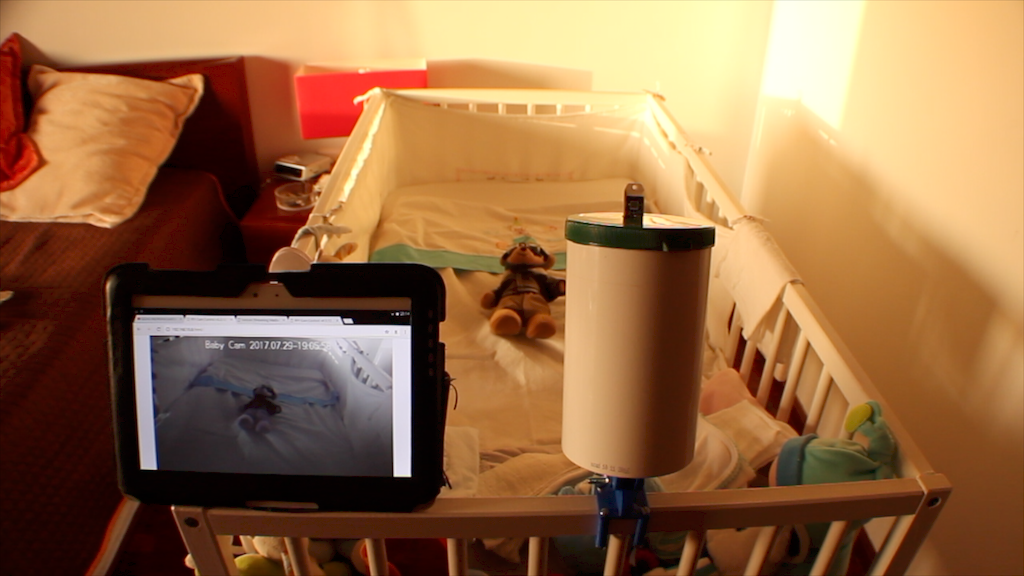
One project that i needed to complete with some urgency was a baby monitor. There are several types of monitors on the market, but the IP based monitors are expensive and the others don’t have enough range. There are several types of projects for baby monitors on the internet but none as wanted. Because of this, I decided to build my version.
In my case i need some basic requirements:
- Broadcast video (with and without ambient light)
- Broadcast audio
- Transmit ambient temperature and humidity
- Run over IP
For this I decided to use a Raspberry Pi 2 with a NOiR camera.
Material
- Raspberry Pi 2
- NOiR Camera
- MicroSD Card
- USB Microphone
- 100 Ohm resistor
- USB Wifi Dongle
- DHT22 Sensor
- 10 cm USB extension
- 2 VSLY5850 IR leds
- Jumper cables
- Breadboard
- M4x10 Screw
- M4x30 Screw
- M6x20 Screw
- M4 nuts
- M6 wing nut
- M4 Washer
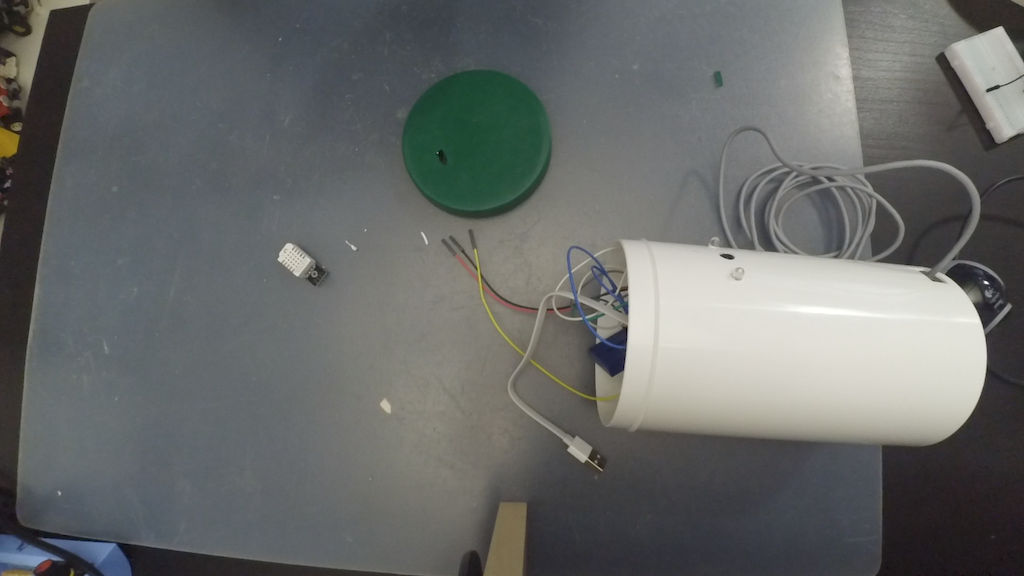
- A container for all the electronic (i use a turtle food container)
- Powerbank ( i use a 10000mAh)
In addition to this material it was necessary to design and print the pieces that constitute the support and that are fixed to the crib allowing the inclination (available in my Thingiverse account).
Electronics
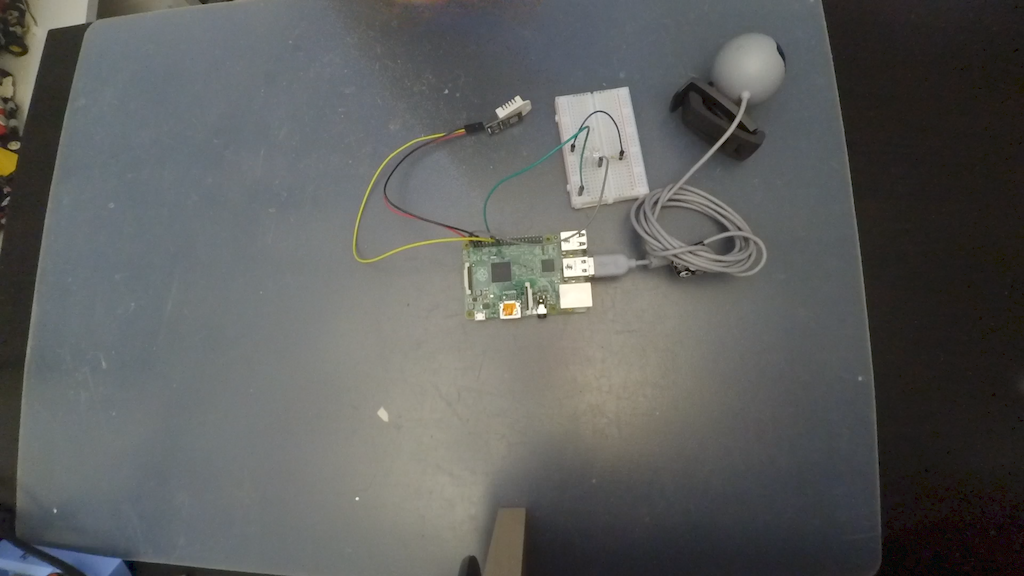
Initially the Raspberry PI 2 was prepared. The IR LEDs, the NOiR camera and the DHT22 temperature sensor were connected.
The led’s were connected to the 5V and ground pins, with the resistance between the led’s and the 5v pin.
The DHT22 was connected to ground, 3.3V and GPIO22 pins. This will transmit the temperature and humidity through the MQTT protocol.
Finally was connected the USB wifi dongle, the USB microphone and the NOiR camera. Initially it was necessary to use a USB webcam because i haven’t received the USB microphone yet but at the end of the project it was replaced).
I’ve installed the raspbian with the default options and installed the RPi-Cam-Web-Interface (http://elinux.org/RPi-Cam-Web-Interface). This is software that allows the capture of the image from a camera and transmit it to a web server on Raspberry Pi. Also this was installed with the default options.
After that i’ve installed the DarkIce and Icecast2 packages with the following commands:
sudo apt-get install darkice

sudo apt-get install icecast2
Darkice lets you capture sound from the USB microphone and send it to a streaming server. Icecast2 creates the streaming server and makes it available over IP.
Stand
Then it was necessary to draw the different parts that makes the stand. This will be fixed to the crib and allow the camera to be tilted. For this I used Autodesk Fusion 360 and printed them on my Prusa I3 Hephestos.
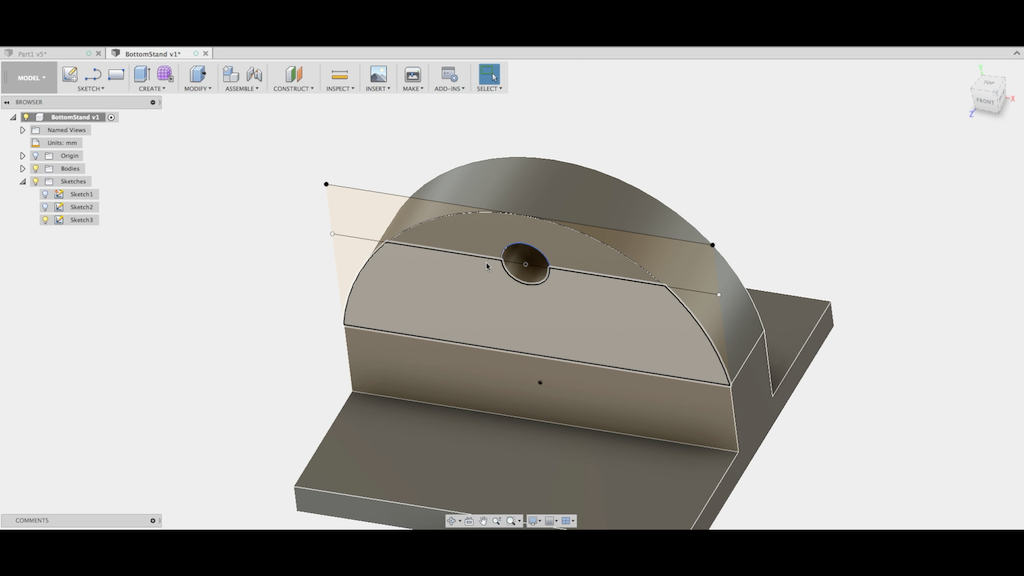
It consists of three parts:
- The part that is attached to the container
- The part that is in contact with the crib and allows the inclination
- The parts that fix everything to the crib.
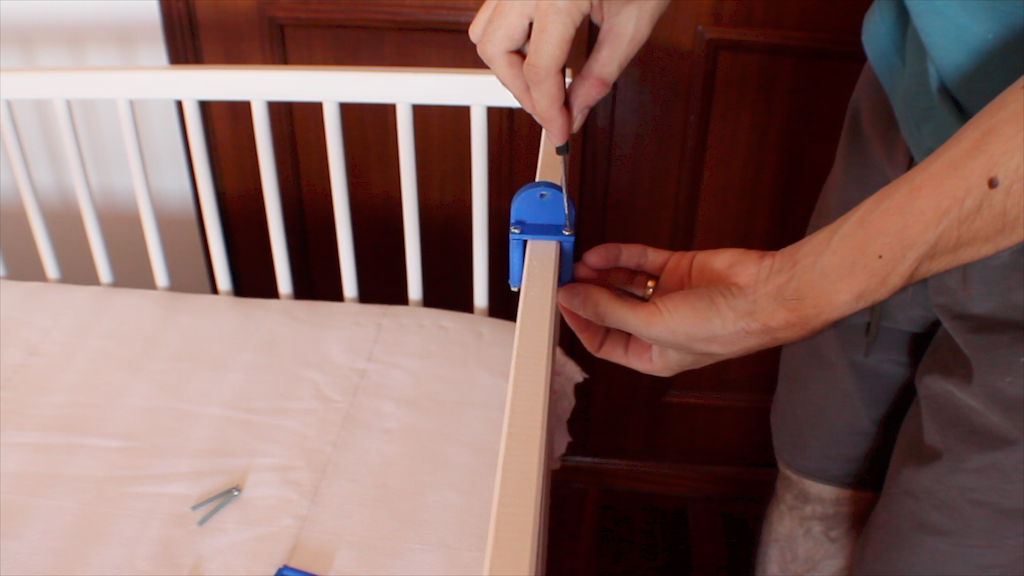
After printing the bottom of the crib holder was fixed.
Assembly
For the assembly the container that will hold all the electronics was prepared to create the places for both the IR LEDs and the camera and secured part of the crib holder.
The camera (which was later replaced by a USB microphone) and the DHT22 sensor was installed. It was all set temporarily so it will be to dismount within some time.
It was installed in the crib and power through a powerbank to prevent wires around the crib.
Finally the entire system was tested with ambient light and without it.
Comments are closed.